Mini Tubular Level Gauge (MTTG) – Pune Techtrol
Description
The Mini Tubular Level Gauge is a cost-effective solution for providing a compact visual indication of liquid levels in small tanks.
Mini Tubular Level Gauge

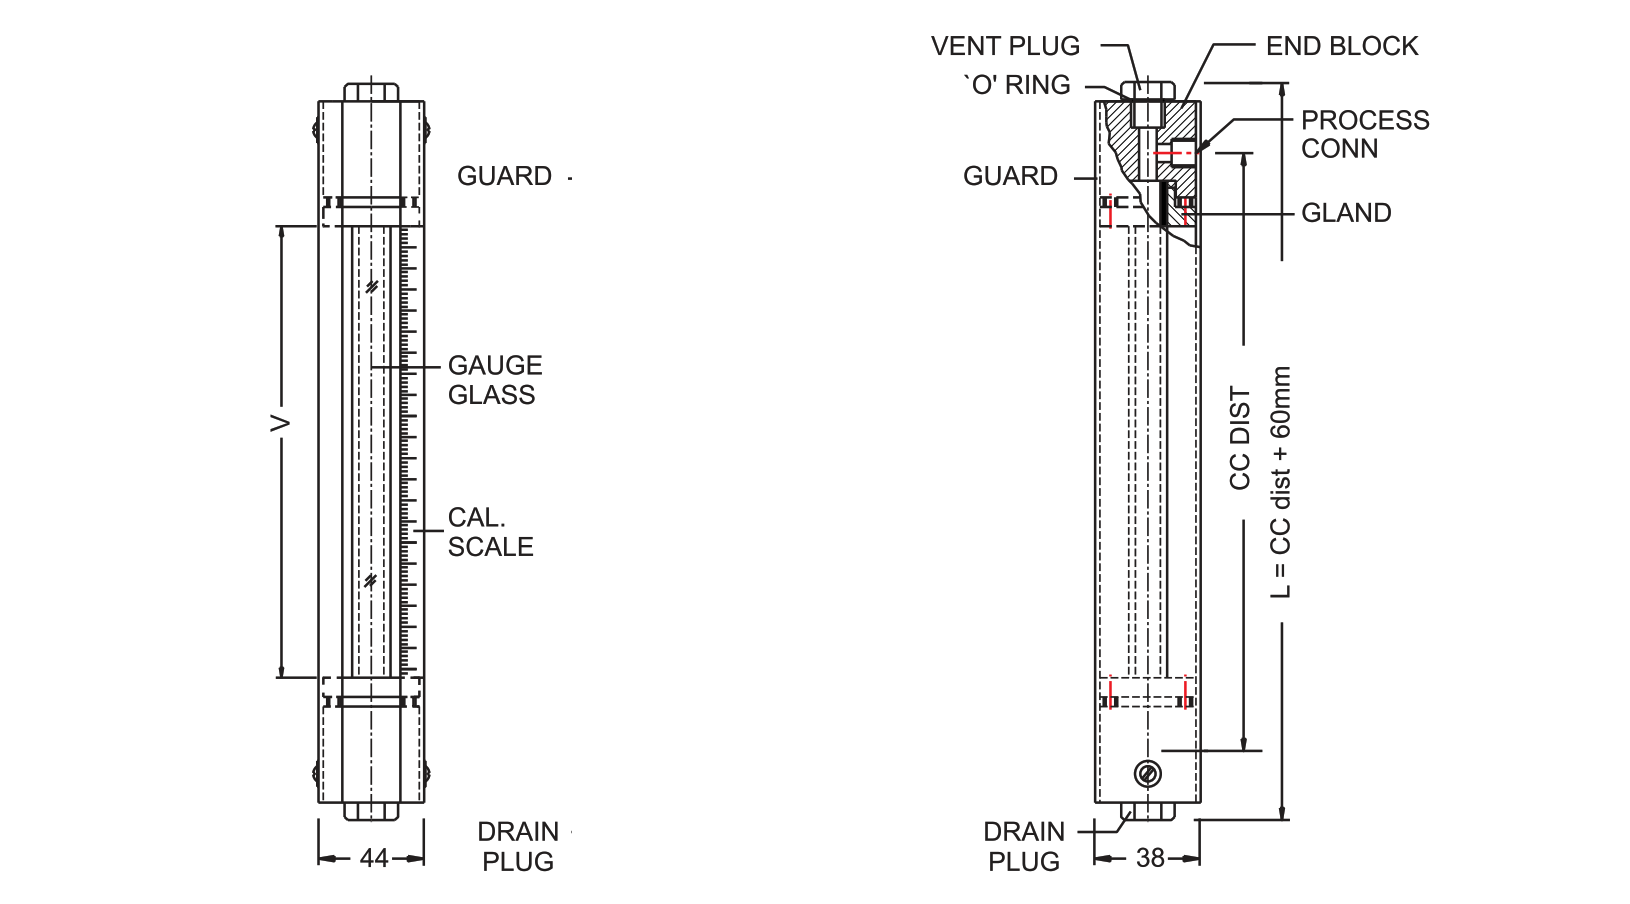
The Mini Tubular Level Gauge is made up of a borosilicate glass tube, metallic end blocks, and guards in the form of ‘C’ channels. It is side-mounted to the tank and has a leak-proof gland packing system, protecting the gauge glass from accidental blows.
The level gauge forms a closed loop, allowing the tank liquid to seek its level in the gauge and providing a compact and economical visual indication of liquid levels in small tanks.
Specifications of Mini Tubular Level Gauge
The Mini Tubular Level Gauge has:
- End Blocks made of SS304 or SS316
- Process Connection of 1/4″ BSP (F)
- Gauge Glass made of Toughened Borosilicate Glass with 16mm OD and 3mm thickness
- Guards made of MS (Epoxy Powder Coated)
- Gland made of MS (Epoxy Powder Coated)
- Vent & Drain of 1/4″ BSP Plug
- Gland Packing made of Neoprene or Viton O-Ring
- Calibration Scale made of Polycarbonate with a least count of 2mm
- Center-to-Center Distance (Range) options of 100mm, 200mm, 250mm, 300mm, 350mm, or 400mm
- Visibility calculated as V = CC Dist – 55mm
- Maximum temperature of 70°C (Neoprene) or 100°C (Viton)
- Pressure Rating of 10 Kg/cm at Ambient Temperature.
Tubular Level Gauge Installation
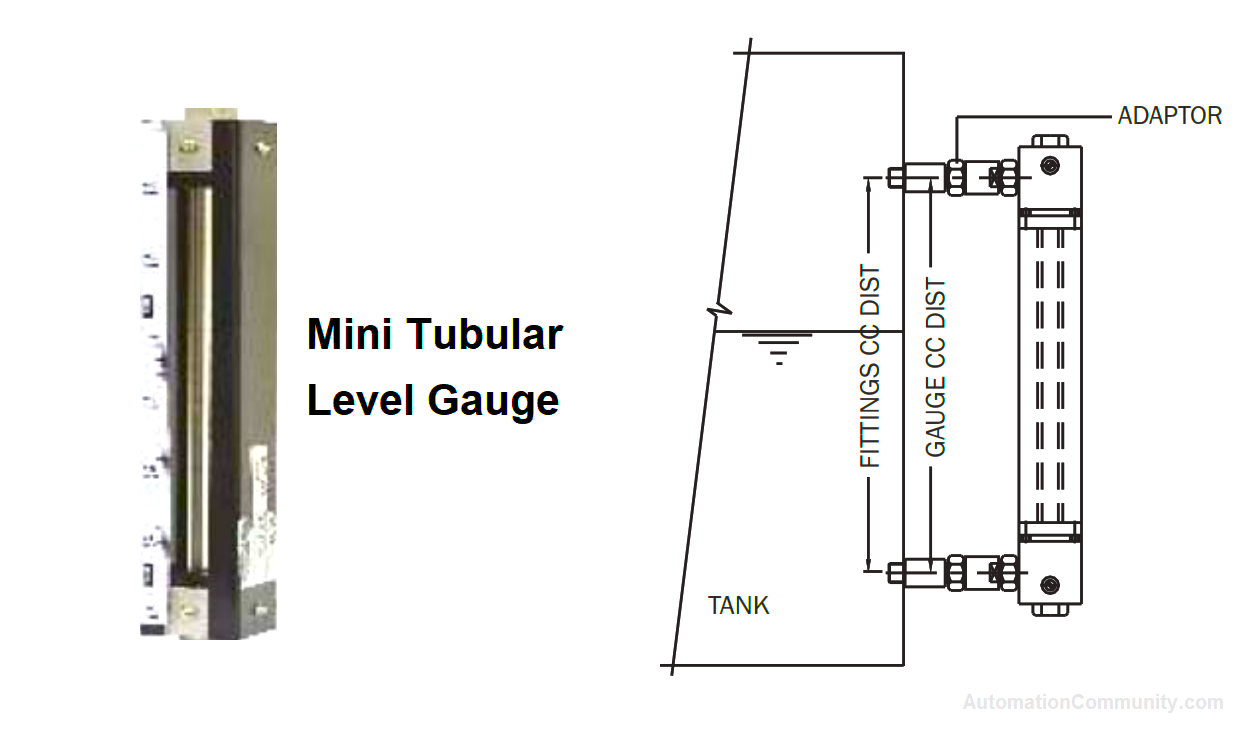
The gauge should be side-mounted to the tank using thread fittings to ensure proper alignment. The distance between tank fittings must correspond to the gauge’s CC distance to prevent damage or breakage of the gauge glass.

Installation steps:
- Choose a location on the tank where vibrations are minimal.
- Check that the tank’s thread fittings match the gauge connections.
- Mount the gauge on the side of the tank, ensuring it is vertically straight.
- Ensure the CC distance of the tank corresponds to the CC distance of the gauge.
- Apply a suitable thread sealant between the threads before tightening the thread fittings to avoid leakage.
Maintenance
Maintenance for the Mini Tubular Level Gauge includes:
- Regularly inspect the gauge glass for any cracks or damages and replace it if necessary.
- Clean the gauge glass tube by opening the vent and drain plugs and pouring warm water through the vent opening.
- Periodically check for any leakages through tank fittings or drain plugs and tighten fasteners or plugs to stop leakage.
- Replace gland packings if there is leakage through the gauge glass.
Replacement of Gauge Glass Tube & Gland Packing

Glass tube and gland packing replacement:
- Empty the tank and detach the gauge from the tank.
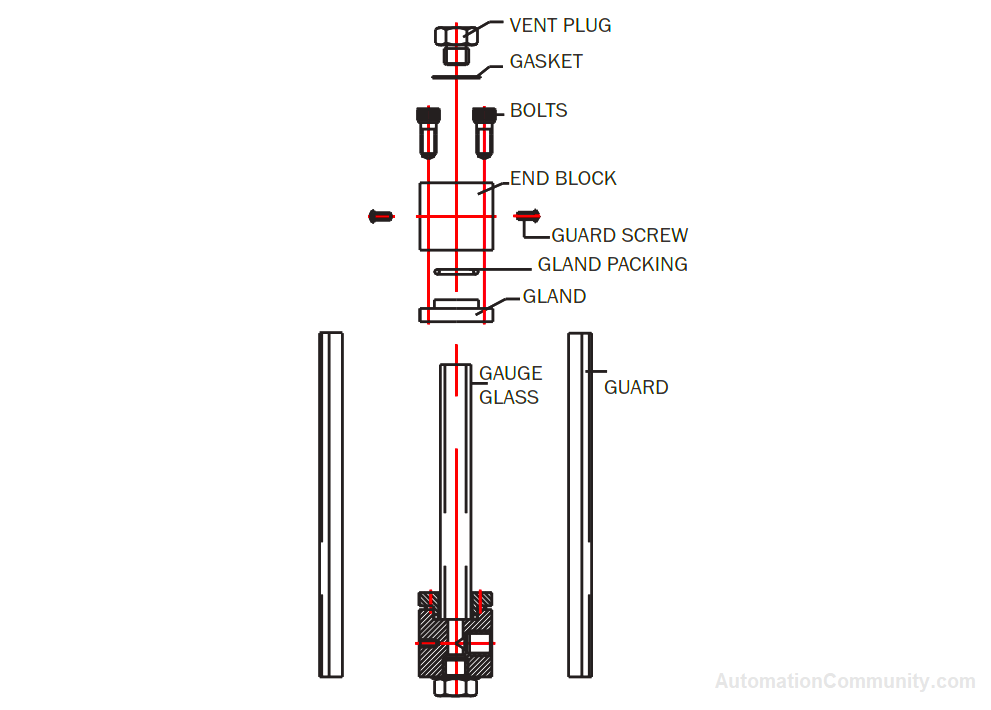
- Remove the drain, vent, guard screws, and gland bolts.
- Remove gauge glass and gland packings, and clean gauge parts.
- Discard used gland packings, and use fresh gland packings every time the gauge glass is replaced.
- Place gland packings on both end blocks.
- Insert the gland over the gauge from both sides and fit the gauge between the end blocks, then tighten the gland bolts.
- Ensure gauge glass is held in plumb.
- Screw side guards to end blocks.
- The gauge is now ready for use.
Location
Report abuse
Report abuse
Featured


